Hey everyone, it is Drew, welcome to my recipe site. Today, I will show you a way to make a special dish, salt-seasoned yakitori on a grill. One of my favorites. This time, I’m gonna make it a little bit tasty. This will be really delicious.
Great recipe for Salt-Seasoned Yakitori on a Grill. I tried "Very Juicy Salty Fried Chicken"and wanted make a healthy version by grilling the chicken instead. The same amount of salt as sugar, and grated garlic work well!
Salt-Seasoned Yakitori on a Grill is one of the most well liked of current trending meals on earth. It’s appreciated by millions every day. It is simple, it’s fast, it tastes delicious. They are fine and they look wonderful. Salt-Seasoned Yakitori on a Grill is something that I have loved my entire life.
To get started with this recipe, we have to first prepare a few ingredients. You can cook salt-seasoned yakitori on a grill using 12 ingredients and 12 steps. Here is how you cook it.
The ingredients needed to make Salt-Seasoned Yakitori on a Grill:
- Take 2 Chicken thighs
- Make ready 2 The white part of a Japanese leek
- Get 1/2 tsp Salt for the Japanese leek
- Prepare 1 Vegetable oil to grease the grill
- Prepare Seasonings for the chicken thighs
- Make ready 1 tbsp Sake
- Prepare 1 tsp Salt
- Make ready 1 tsp Sugar
- Prepare 1/2 tsp Grated garlic (in a tube)
- Get Prepare
- Take 12 Bamboo skewers
- Make ready 1 Aluminum foil
We have voted this place as our favorite place for value-for-money authentic. How to Create Appetizing Salt-Seasoned Yakitori on a Grill. Recipe: Delicious Grilled Lemon Chicken with your favorite barbecue sauce. Ingredients of Creamy Chicken pot pie.
Steps to make Salt-Seasoned Yakitori on a Grill:
- Cut each chicken thigh into 12 pieces (24 pieces all together) and put into a bowl. Add the seasonings and rub in well.
- Cut the white part of the Japanese leek into 24 pieces and put into a separate bowl. Sprinkle with salt and stir.
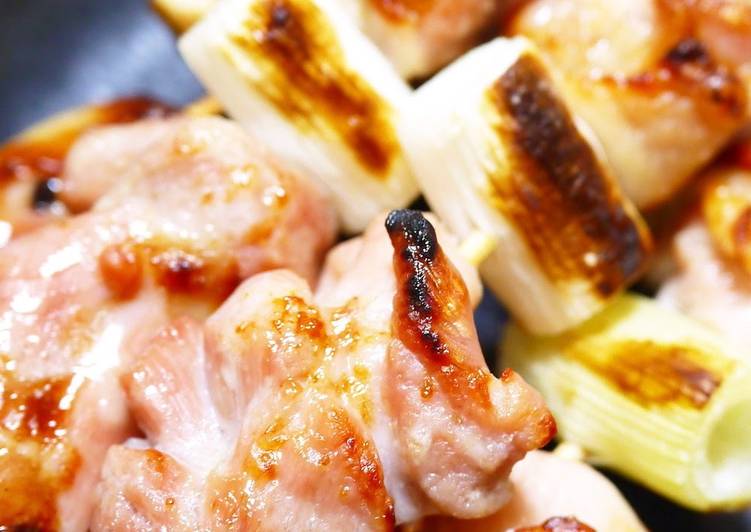
- Skewer on a stick alternating between white leek and chicken. Wrap the ends of the skewers with foil to prevent burning.
- Grease the with a paper towel soaked in vegetable oil.
- Check your stove manual to see if you need to put water in the tray under the grill before grilling.
- Line up Step 4 of the prepared skewers on the greased grill and cook for 10 -15 minutes on high heat, keeping an eye on them. If grilling 4 skewers on both sides.
- For grills that cook both sides at the same time, just leave them as is. For grills that only cook one side at a time, turn the skewers over half-way through.
- When they are cooked, remove the foil from the ends of the skewers and transfer the sticks to a serving dish.
- Scrape off any chicken that is stuck on the grill, and grease again with vegetable oil before grilling the next batch.
- The second batch will cook faster, since the grill is already hot.
- If you don't have a fish grill, heat a frying pan with vegetable oil, add the yakitori skewers, cover with a lid and fry on both sides.
- Feel free to cut the chicken and white leek into as many pieces as you like, and skewer any way you desire.
Yakitori is a Japanese dish where chicken meat is cut into small pieces, skewered on bamboo sticks and grilled. There are usually several pieces on each skewer (anywhere from one to five), which are seasoned and cooked on an open-fire grill. The types of seasoning used in yakitori tend to fall into two main categories: salt and tare or sauce. TRADITIONAL JAPANESE RECIPE: Yakitori bars serve very basic type of Yakitori like ours, but also there are a wide variety of skewered items there. They use every part of a chicken for Yakitori.
So that is going to wrap it up for this exceptional food salt-seasoned yakitori on a grill recipe. Thank you very much for reading. I am confident you can make this at home. There is gonna be more interesting food in home recipes coming up. Remember to bookmark this page in your browser, and share it to your loved ones, colleague and friends. Thank you for reading. Go on get cooking!